Thursday, January 31, 2008

CPU Sockets


A CPU socket or CPU slot is a connector on a computer's motherboard that accepts a CPU and forms an electrical interface with it. As of 2007, most desktop and server computers, particularly those based on the Intel x86 architecture, include socketed processors.

Most CPU-sockets interfaces are based on the pin grid array (PGA) architecture, in which short, stiff pins on the underside of the processor package mate with holes in the socket. To minimize the risk of bent pins, zero insertion force (ZIF) sockets allow the processor to be inserted without any resistance, then grip the pins firmly to ensure a reliable contact after a lever is flipped.

As of 2007, several current and upcoming socket designs use land grid array (LGA) technology instead. In this design, it is the socket which contains pins. The pins contact pads or lands on the bottom of the processor package.

In the late 1990s, many x86 processors fit into slots, rather than sockets. CPU slots are single-edged connectors similar to expansion slots, into which a PCB holding a processor is inserted. Slotted CPU packages offered two advantages: L2 cache memory could be upgraded by installing an additional chip onto the processor PCB, and processor insertion and removal was often easier. However, slotted packages require longer traces between the CPU and chipset, and therefore became unsuitable as clock speeds passed 500 MHz. Slots were abandoned with the introduction of AMD's Socket A and Intel's Socket 370.

Assignment


Step 1
Before you start: Ground yourself. Lightly touch your PC's metal chassis to discharge any current from your body. Then unplug the power cable.
What you'll need: A phillips-head screwdriver, needlenose pliers, and antistatic wrist strap.


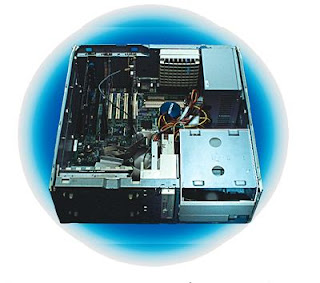
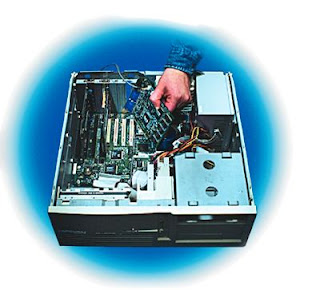
Turn off the computer and open the case. Locate an available PCI slot for the MPEG-2 decoder card (if your kit includes one). If you're installing a SCSI drive and you don't yet have a SCSI controller in the system, you'll need a second slot for the SCSI card.


Step 2
Remove the end bracket for the selected slot, insert the card, and secure the card's own end bracket.


Step 3
Locate an available 5.25-inch drive bay that opens onto the front of the case. Remove the bay cover if necessary.


Step 4
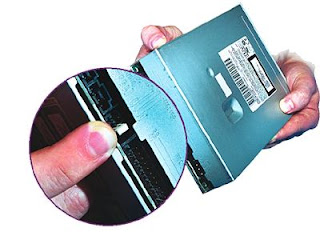
Configure the jumpers on your DVD drive. For an IDE drive, set the jumpers for either master, slave, or sole drive, depending on what else is on the channel. For a SCSI drive, set the jumpers to the correct ID or termination setting.


Step 5
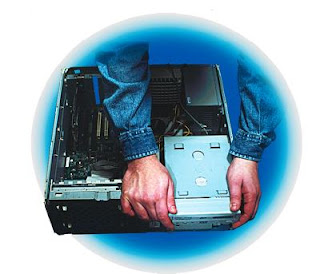
Secure the drive in the bay.


Step 6
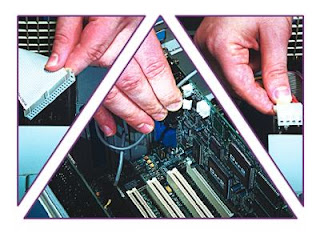
Attach the cables. Connect the DVD drive to the IDE or SCSI bus and to the power supply. Also connect the DVD drive to your sound card - or connect the decoder card (if included) to the DVD drive and sound card. (If you already have a CD-ROM drive, you can use a micro stereo patch cord to connect the external headphone jack on the DVD drive to your sound card's line-in jack).


Step 7
Close the case, turn on the power, and install any necessary drivers or software.

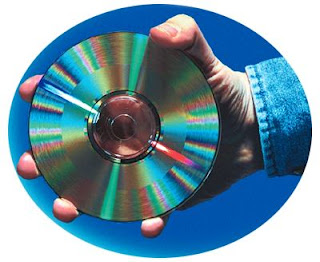
Install DVD drive

Install DVD drive: "Step 1
Before you start: Ground yourself. Lightly touch your PC's metal chassis to discharge any current from your body. Then unplug the power cable.
What you'll need: A phillips-head screwdriver, needlenose pliers, and antistatic wrist strap.
Turn off the computer and open the case. Locate an available PCI slot for the MPEG-2 decoder card (if your kit includes one). If you're installing a SCSI drive and you don't yet have a SCSI controller in the system, you'll need a second slot for the SCSI card."

Wednesday, November 28, 2007

Assignment # 2

How to upgrade to Windows Vista from an earlier version of Windows

Step 1: Start the current version of Windows

Start the version of Windows that you want to upgrade from.

Step 2: Prepare to upgrade to Windows Vista• Exit all programs before you upgrade to Windows Vista. These programs include browsers and media players.
• Make sure that you are connected to the Internet.
• View the following Microsoft Web sites.
System requirements
919183 (http://support.microsoft.com/kb/919183/) System requirements for Windows Vista
Upgrade paths from earlier versions
http://www.microsoft.com/windows/products/windowsvista/buyorupgrade/upgradepaths.mspx (http://www.microsoft.com/windows/products/windowsvista/buyorupgrade/upgradepaths.mspx)
This Web site explains the options that you have when you upgrade from Microsoft Windows XP or from Microsoft Windows 2000.

Windows Vista Upgrade Advisor
http://www.windowsvista.com/upgradeadvisor (http://www.windowsvista.com/upgradeadvisor)
The Windows Vista Upgrade Advisor can help you determine whether a computer that is running Windows XP can run Windows Vista.
Step 3: Insert the Windows Vista DVD into the DVD drive

Follow these steps:a. Insert the Windows Vista DVD into the DVD drive , and then close the drive tray.
b. Wait a moment for the Setup program to start automatically.
Step 4: Click "Install Now"

When the Setup program starts, the Install now screen appears. Click Install now.

If the Setup program does not start automatically, follow these steps: a. Click Start, click Run, type Drive:\setup.exe, and then click OK.

Note Drive is the drive letter of the computer's DVD drive.
b. Click Install Now.
Note When you are prompted with the Get important updates for installation message, click Go Online.

Step 5: Use the Upgrade option to finish the installation

When the Which type of installation do you want? screen appears, click Upgrade. Then, follow the instructions to install Windows Vista.
How to troubleshoot the "Upgrade has been disabled" message
When you try to upgrade to Windows Vista, the Upgrade option may be unavailable. If this issue occurs, you receive the following message:
Upgrade has been disabled
This issue may occur if one or more of the following conditions are true:• You cannot upgrade the operating system to Windows Vista. (Not every Windows operating system can be upgraded to Windows Vista.)
• You did not start the computer by using the current operating system. Instead, you started the computer from the Windows Vista DVD. To resolve this issue, start the computer by using the current operating system. Then, run the Setup program.
• The operating system is installed on a partition that uses the FAT32 file system. To resolve this issue, convert the file system on the partition to use the NTFS file system. For more information about how to resolve this issue, click the following article number to view the article in the Microsoft Knowledge Base:
307881 (http://support.microsoft.com/kb/307881/) How to convert a FAT16 volume or a FAT32 volume to an NTFS file system in Windows XP
• The partition on which you want to install the upgrade to Windows Vista has insufficient space on the hard disk. To resolve this issue, free additional space on the hard disk. For more information about how to use the Disk Cleanup tool to free hard disk space, click the following article number to view the article in the Microsoft Knowledge Base:
310312 (http://support.microsoft.com/kb/310312/) Description of the Disk Cleanup tool in Windows XP

Back to the top

How to perform a clean installation of Windows Vista by running Setup from the current version of Windows
Warning In a clean installation, existing data is deleted. This data includes personal data and settings. After you install the operating system, you must also reinstall all programs. Make sure that you back up personal data before you perform a clean installation.

Step 1: Start the current version of Windows

Start the version of Windows that you want to upgrade from.

Step 2: Insert the Windows Vista DVD into the DVD drive

Follow these steps:a. Insert the Windows Vista DVD into the DVD drive , and then close the drive tray.
b. Wait a moment for the Setup program to start automatically.
Step 3: Click "Install Now"

When the Setup program starts, the Install now screen appears. Click Install now.

If the Setup program does not start automatically, follow these steps: a. Click Start, click Run, type Drive:\setup.exe, and then click OK.

Note Drive is the drive letter of the computer's DVD drive.
b. Click Install now.
Step 4: Use the Custom (advanced) option to finish the installation

When the Which type of installation do you want? screen appears, click Custom (advanced). Then, follow the instructions to install Windows Vista.
Back to the top

How to perform a clean installation of Windows Vista by starting the computer from the Windows Vista DVD
Warning In a clean installation, existing data is deleted. This data includes personal data and settings. After you install the operating system, you must also reinstall all programs. Make sure that you back up personal data before you perform a clean installation.

Step 1: Start the computer by using the Windows Vista DVD

Insert the Windows Vista DVD into the DVD drive , and then close the drive tray. Then, restart the computer.

Note The computer must be configured to start from the DVD drive. For information about how to configure the computer to start from the DVD drive, see the documentation that is included with the computer. Or, contact the computer manufacturer.

Step 2: Press any key

When the "Press any key to boot from CD" message appears, press a key.

Step 3: Complete the installation process

Follow the instructions to install Windows Vista.
Back to the top

Assignment # 2

3.How to install Microsoft Windows 2000.

Answer:

Below are the steps required to install the standard version of Microsoft Windows 2000. It is important to realize that some computer manufacturers have their own proprietary install of Windows 2000 on a Recovery or Restore disc. Therefore, the below steps may not all apply to how Windows 2000 is installed on your computer. If the below steps do not apply to how Microsoft Windows 2000 is installed on your computer and you are unable to correctly reinstall Windows 2000, it is recommended you contact your computer manufacturer for additional help; Computer Hope will not know how to install Windows using your manufacturer's CD.

1. The standard Microsoft Windows 2000 CD is bootable. Therefore, start by placing the Windows 2000 CD in your computer and reboot.
2. As computer boots it may prompt you to press any key to boot from CD. Press any key. If you do not get this prompt or are unable to boot from the CD, please refer to document CH000217 for information on how to boot from a CD.
3. When prompted, press the enter key to setup Windows.
4. If you agree with the license agreement, press the F8 key.
5. If a previous Operating System was on the computer that you do not wish to keep, it is recommend you delete the partition before installing Windows. To delete the partition, select the partition you wish to delete and press the D key and then if you are sure, the L key.
6. Once the partition has been deleted, press the C key to create a new partition; specify the size of the partition you wish to create, by default this should be the maximum size of the partition.
7. Select the partition you want to install windows on and press enter to install, and C to continue with the setup
8. If you erased the partition, press enter to continue with the formatting of the NTFS file system.
9. Once the computer has rebooted, do not press any key to boot from the CD and let the computer boot and continue the remainder of the install for Windows 2000.
10. Complete the remainder of the setup by filling out or setting each of the remaining questions and/or options.

After Microsoft Windows 2000 has successfully completed the installation, it is recommended that you update your drivers and you update Windows through Microsoft's Windows Update. Additional information about how to do this can be found on document CH000545.

Assignment # 2

2.How to Install Windows XP

Windows XP is arguably Microsoft’s best operating systems to date. It’s probably the most user-friendly, stable, complete and compatible OS to come from the company in one package. Along the same lines, it’s also really easy to install. So why are we writing an article on how to install Window XP? Well, there are a couple reasons… First, we wrote this article because we know of a couple tricks to make your installation go more smoothly, and if you run into problems, we probably know the cause. We know of ways to make your PC faster, despite the fact it’ll be running the same OS as your neighbor or Counter-Strike rivals.

The most important reason for writing this article is that many people are afraid to install something as serious as an operating system – and for a good reason. If you have ever installed Windows 3.1, 95 or even 98 before, you know it can be a frustrating and tricky task. There are a couple steps you must follow that are too much for the average PC user (if you’ve even found Tweak3D, you are probably much more tech-savvy than that average PC user). A boot diskette is required, and it seems that at least 90% of the time it is corrupted. Some familiarity with DOS is necessary, and the wrong move can nuke your hard drive. If errors are encountered, no colorful and friendly menus are there to help you wade through the mess.

The days of risky business are over, though. Yes, installing a Microsoft OS is a very easy task, so long as you follow a couple steps that we’ve included in this guide to make your life easier. For best results, you’ll want to print this article and use it while you install Windows XP. This guide was written with Windows XP Professional in mind, but Windows XP Home will offer very similar options and this guide should offer ample support.

Assignment # 2

1. How to install Microsoft Windows 98.

Answer:

Below are the steps required to install the standard version of Microsoft Windows 98 and the Second Edition of Windows 98. It is important to realize that some computer manufacturers may have their own install of Windows 98, therefore the below steps may not all apply to how Windows 98 is installed on your computer. If the below steps do not apply to your computer's setup of Windows 98 and you are unable to determine how to install Windows, it is recommended you contact your computer manufacturer for additional help; Computer Hope will not how to install Windows using your manufacturer CD.

1. If you have not already, you may wish to read through document CH000186 for additional information about erasing your hard disk drive and starting over.
2. From the MS-DOS prompt, switch to the CD-ROM drive; commonly this is the D: drive. Additional information about switching drives in MS-DOS can be found on document CH000515.
3. Once in the CD-ROM drive, type cd win98 and press enter.
4. Once in the WIN98 directory, type setup and press enter.
5. Press Enter to start the check and this should start the Microsoft Windows 98 setup installation. Microsoft Windows 98 will start by checking the hard disk drive for any errors; once completed, press the Continue button to start the installation.
6. If you agree with the Microsoft Windows 98 license agreement, check I accept the Agreement and click the Next button.
7. If you are installing Windows 98 SE, Insert your Microsoft Windows 98 SE product key. If you have lost this key, please see document CH000156.
8. If you are using the Microsoft Windows 98 SE upgrade CD, you may be prompted to insert the original Windows 98 CD or point to the Windows 98 setup at this point.
9. Windows 98 will then prompt you to where you wish to install Windows 98. Unless you wish for a different directory, leave it at the default C:\Windows directory and click Next.
10. Choose the Type of Setup you wish to do; most users will wish to remain with the Typical setup. Once the setup has been selected, click the Next button. If you have chosen a setup other than Typical, the below steps may not all apply to your setup.
11. Choose Install the most common components (Recommended) and click Next.
12. Enter the computer's Identification, if you do not plan on connecting to the computer to a network you can leave the default data and click Next. This information can also be entered later.
13. Enter your location and click Next.
14. Click Next to create a startup disk.
15. If you do not wish to create a startup disk, Click Cancel, otherwise put a blank diskette in the computer and click Ok.
16. Click Ok when prompted to remove the disk.
17. Click Next to start copying files.
18. Once ready, click Okto restart the computer. Make sure if any diskette is in the computer that it is removed from the computer.
19. If you are installing the original Windows 98, you may be prompted for the Product key after the computer restarts; insert your Windows 98 product key and click Next. If you have lost this key, please see document CH000156.
20. Continue through the remainder of the setup answering each of the questions.

If you have a connection to the Internet it is recommended that you download and update all the Microsoft Windows updates and critical updates to get your computer running more smoothly and to help protect it from any potential risks. Additional information about updating your Windows computer can be found on document CH000545.